To properly display this page you need a browser with JavaScript support.
Menu
Index
Search
To properly display this page you need a browser with JavaScript support.
Search
Search
HELP MODULES
TimeTable Main Screen
Reports
Timetable Reports
Class Timetable
← Previous page
Next page →
Class Timetable
Class Timetable
Note
: These reports will only display Timetable information once the user has generated a
valid
Timetable.
This report is used to print timetables for:
(i) The
whole school
including
all classes
for
all grades.
(ii) A
specific grade
including
all classes
for the
specific grade.
(iii) A
specific class
in a
specific grade
.
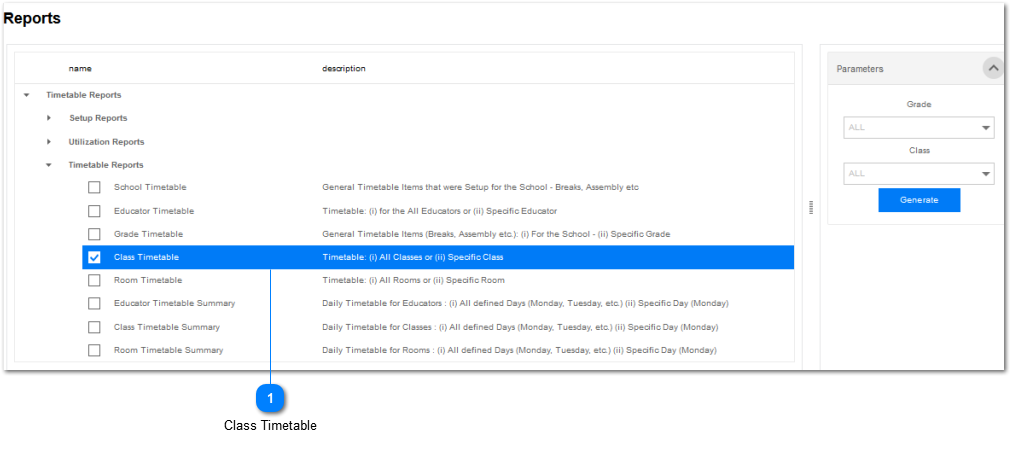
Report for All Classes
in a
All Grades
Select the
Class Timetable Report
by
Left Clicking
on the report
.
The
Report Parameters panel
will indicate that the
Class Timetable Report
option was selected.
The
system default
for the report is
All
.
Should the user want to generate a
Class Timetable Report
for the
whole school
, including
all Classes
for
all Grades,
Left Click
on the
Generate
button (
).
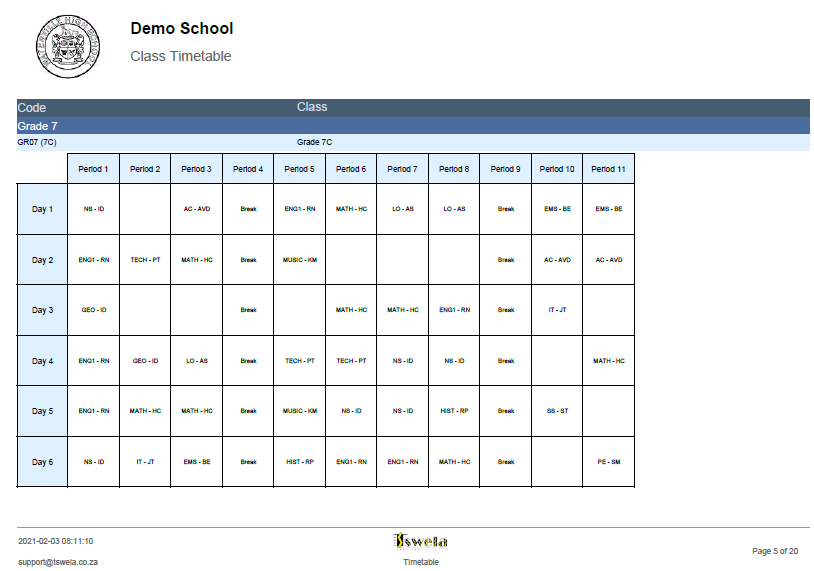
The screen below will be displayed. The timetables for
all Classes
for
all Grades
will be printed.
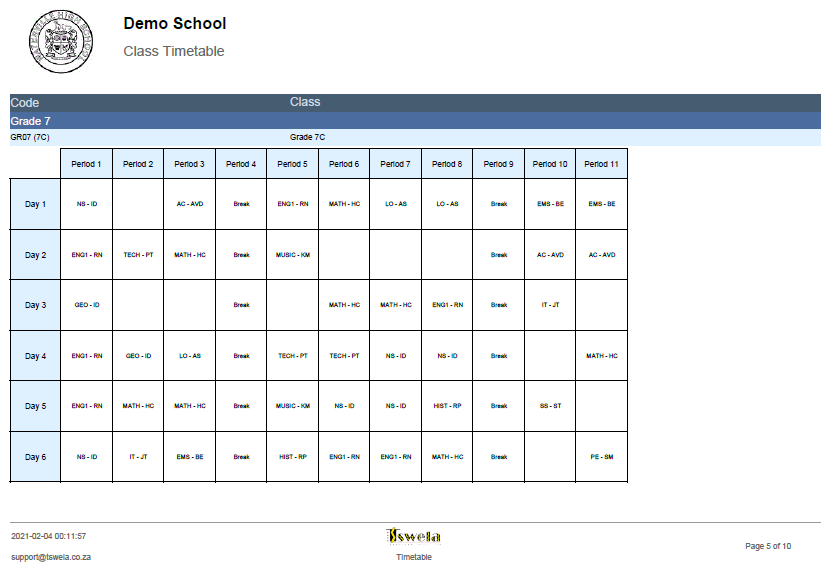
The page count gives an indication that the number of timetables that will be printed will be
20
. The current report is
5
of
20
.
The report can now be
printed
by
Left Clicking
on the
Print
button.
The user also has the option to
save
the report by
Left Clicking
on the
Save/Download
button.
Report for All Classes
in a
Specific Grade
The report parameters can be changed to generate timetables for
All Classes
in a
Specific Grade
.
This is done by
Left Clicking
on the
Grade list box
. A list of all the
Grades
that are available is displayed.
The specific
Grade
is selected by
Left Clicking
on the
Grade
in the list.
The
Class
list box selection system default is
All
. This selection is
not changed
.
For this example
Grade 7
was selected.
When the
Grade
has been selected,
Left Click
on the
Generate
button (
).
The screen below will be displayed.
The timetables for all classes in the grade that were created for
Grade 7
are displayed.
The report can now be
printed
by
Left Clicking
on the
Print
button.
The user also has the option to
save
the report by
Left Clicking
on the
Save/Download
button.
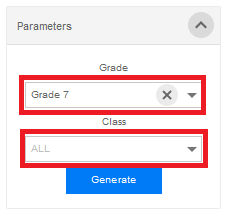
Report for a Specific
Class
in a
Specific Grade
in a
Specific Grade
The report parameters can be changed to generate a timetable for a
Specific
Class
in a
Specific Grade
.
This is done by selecting a
Specific Grade
as described above (for this example
Grade 7
was selected).
Once this has been done,
Left Click
on the
Class list box
.
A list of all the
Classes
that were created for
Grade 7
is displayed.
The specific
Class
is selected by
Left Clicking
on the
Class
in the list.
For this example
Class 7 C
was selected.
When the
Grade
and the
Class
have been selected,
Left Click
on the
Generate
button (
).
.
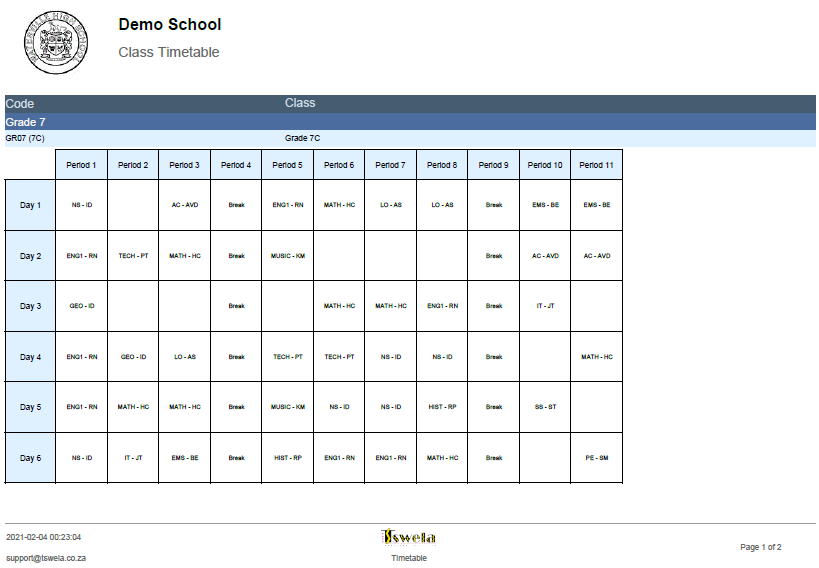
The screen below will be displayed. The timetable for
Class 7C
was created.
The report can now be
printed
by
Left Clicking
on the
Print
button.
The user also has the option to
save
the report by
Left Clicking
on the
Save/Download
button.
Top
Made with help of Dr.Explain