Menu
Index

Add New Educator

Add New Educator
 
1

General

1. General
 
Note:     The Update () and Cancel () buttons are greyed out
(inactive) and are not available for use.
 
These buttons will become active when:
 
(i)     The user selects an Educator, by Left Clicking on an existing Educator and then selecting
         the Edit button ().
(ii)     The user change existing information
(iii)     The user enters new information.
 
Required/Compulsory fields 
 
The following are required/compulsory fields:
 
(i)     Educator Code
(ii)     Educator Surname
(iii)     Educator Title
(iv)     Educator Initials
    The Required/Compulsory fields must be completed as this is critical information that will be
     used during the creation of the timetable. The user will not be able to save a New
     Educator’s information if these fields are not completed.
 
 
2

Code

2. Code
 
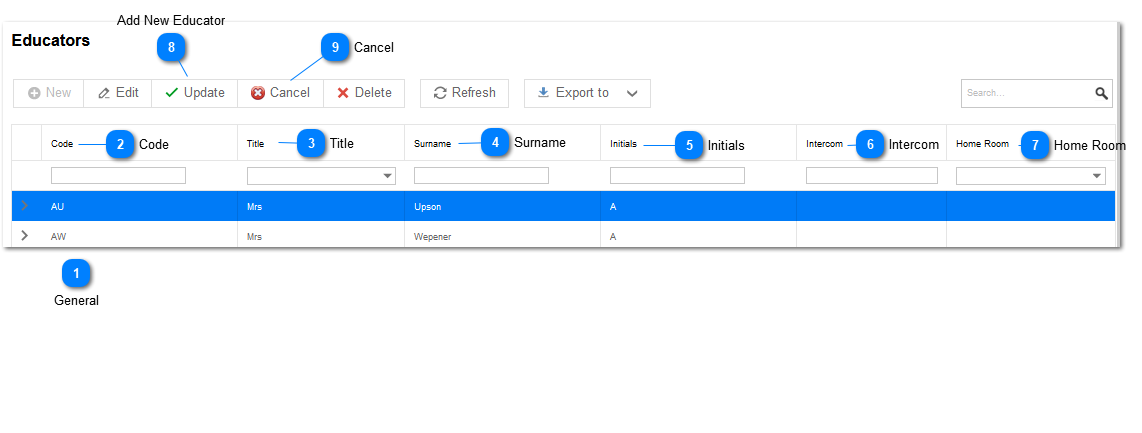
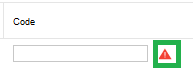
The first field to be completed is the Educator Code. This is a Short Code for the Educator that will be displayed during the creation of the timetable.
 
    The Educator Code is a required/Compulsory field that must be completed as this is critical information that will be used during the creation of the
     timetable.
 
Note:     The Subject Code is restricted to 5 alphanumeric characters.
Should the user not enter an Educator Code and attempts to Save the information by selecting the Update button () the system will give an indication that Educator Code is a  Required/Compulsory field. 
 
    The Educator Code is a unique field. Thus, no two Educators may have the same Code. Should the user try to save an Educator with a Short Code
   that already exists, the Error Screen below will be displayed.


Example:     The Educator’s Name and Surname is Wayne Smith. For this specific Educator it is decided to use the first letters of the Name and
      Surname to create a Short Code. The Short Code thus will be WS
 
Should the user enter a Valid Unique Educator Code and proceeds to Create a New Educator by Left Clicking on the Update button (), the System will give an indication that not all of the Required/Compulsory fields have been entered.


3

Title


Select the correct Title by Left Clicking on the Title field. A pre-populated list of titles will be displayed.
 
To select a Title, Left Click on the appropriate Title in the list.
 
 
Note:     It is important to select the correct Educator Title as this will be used during the creation of the timetable. 
 
 
4

Surname

4. Surname
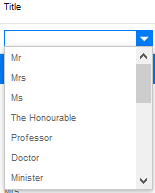
Should the user enter a Educator Surname, proceeds to Create a New Educator by Left Clicking on the Update button (), the System will give an indication that not all of the Required/Compulsory fields have been entered.
 
 
5

Initials

5. Initials
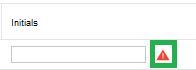
Should the user enter a Educator Initials, proceeds to Create a New Educator by Left Clicking on the Update button (), the System will give an indication that not all of the Required/Compulsory fields have been entered.
 
6

Intercom

6. Intercom
 
The Intercom Number for the specific Educators Home Room can be entered here.
 
This not a Required/Compulsory field.
 
 
7

Home Room

7. Home Room
This is the Educators “Default” class room and it is not a Required/Compulsory field.
 
Select the correct Home Room by Left Clicking on the Home Room field.
 
A list of Home Rooms will be displayed.
 
To select the Home Room, Left Click on the appropriate Home Room in the list.
 
 
Note:     The Home Rooms are created in the Buildings and Rooms Menu option.
 
    Should the user have selected a Home Room for an Educator, where there should not have been a Home Room, the selected Home Room can be
                 Removed by Left Clicking on the Home Room field and then selecting the Delete button ( ) to the Right of the Home Room in the List Box.


8

Add New Educator

Once all relevant Educator Information has been captured/changed, the information can be Saved by Left Clicking on the Update button ().
 
Should all required information have been captured correctly, the Educator will be added to the list of Educators.
 
The Notification Screen below will be displayed, indicating that the New Educator Information was saved successfully.
 
 
Left Click on the OK button to acknowledge the Notification.
 
 
9

Cancel

9. Cancel
The user can Cancel the Current Add Action by selecting the Cancel button ().
Made with help of Dr.Explain