To properly display this page you need a browser with JavaScript support.
Menu
Index
Search
To properly display this page you need a browser with JavaScript support.
Search
Search
HELP MODULES
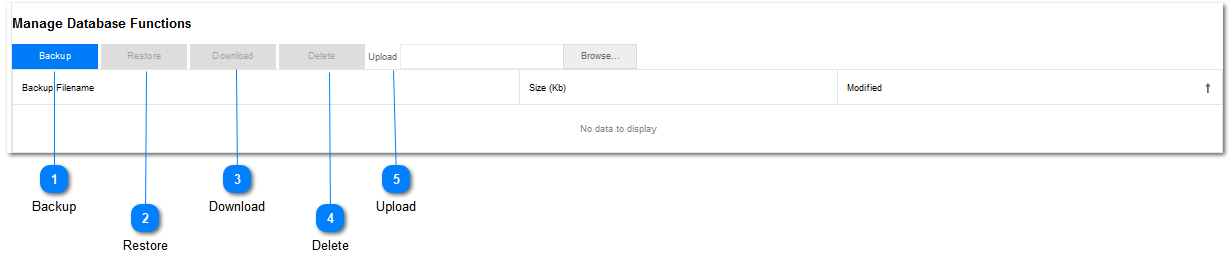
TimeTable Main Screen
Management
Backup and Restore
← Previous page
Next page →
Backup and Restore
Backup
The
Backup
option gives the user the option to make a
Backup
of the
current
Database
.
The
Backup
is made by
Left Clicking
on the
Backup
button.
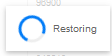
The screen below will be
displayed
while the
Backup
is being
created
:
If this action was successful, the
Backup Notification message
below will be displayed indicating that a
backup
was
created
.
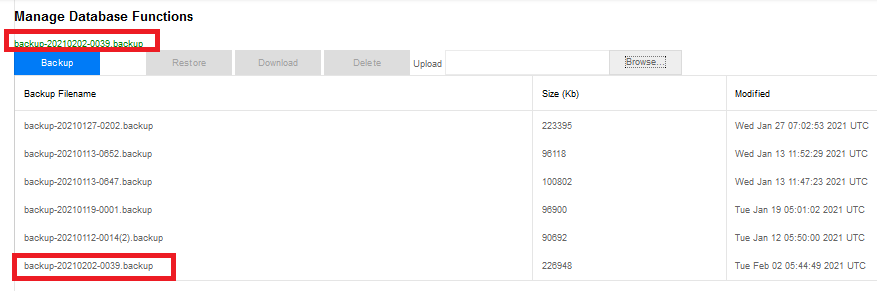
The
Backup File
will be displayed in the
list of Backups
that are available.
Top
Restore
The
Restore
button will
not
be
available
when the
Backup and Restore
page is initially opened.
Select a
Database Backup
from the
list
of backups by
Left Clicking
on the
specific database backup
in the
list
.
The line in the list will turn
Blue
indicating the
selected
database
.
At the same time the
Restore
button will become
Active
.
Left Click
on the
Restore
button.
WARNING
: All current data will be replaced by the data from the Backup file.
The screen below will be
displayed
while the
Backup
is being
restored
:
When the
Restore
action
completed
successfully,
the
Restore Notification screen
below will be displayed.
Top
Download
When a Backup is made, the backup file is
stored
on the hard disk of the
server,
the same directory where the
Tswela TimeTable
system is installed.
The
Download
function must be used if
copy
of the backup is to be stored on
another location
(memory key, local C:/ drive etc.)
Note
: A
Download
can
only
be done once a
Backup
was made.
The
Download
button will
not
be
available
when the
Backup and Restore
page is initially opened.
Select a
Database Backup
from the
list
of backups by
Left Clicking
on the
specific database backup
in the
list
.
The line in the list will turn
Blue
indicating the
selected
database
.
At the same time the
Download
button will become
Active
.
Left Click
on the
Download
button.
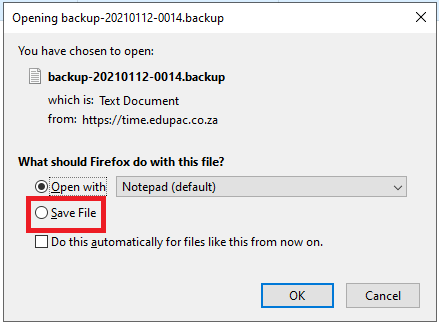
The
File Save Dialogue Screen
below will be
displayed
.
Select the
Save File Option
.
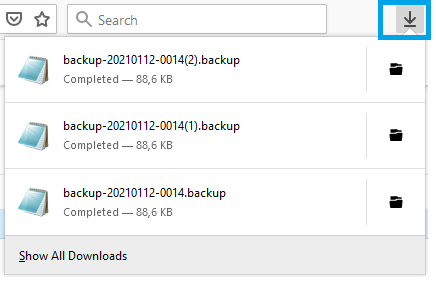
The file will be
downloaded
to the
Downloads Folder
on the
Local Machine.
Top
Delete
Note
: The
Delete
action will be used to
maintain
the
List
of
Backup files
.
The
Delete
button will
not
be
available
when the
Backup and Restore
page is initially opened.
Select a
Database Backup
to be deleted from the
list
of backups by
Left Clicking
on the
specific database backup
in the
list
.
The line in the list will turn
Blue
indicating the
selected
database
.
The
Delete
button will now be
active
.
Left Click
on the
Delete
button.
The system will give an
indication
that the
Backup File
was
deleted
from the
list
of
available
Backup Files
.
Top
Upload
The
Upload
option gives the user the option to
Upload
a
Backup
that was made on a
different location
(for example a DVD, memory key etc.).
The
Upload
is done by
Left Clicking
on the
Browse
button.
The
File Selection Dialogue Screen
below will be
displayed
.
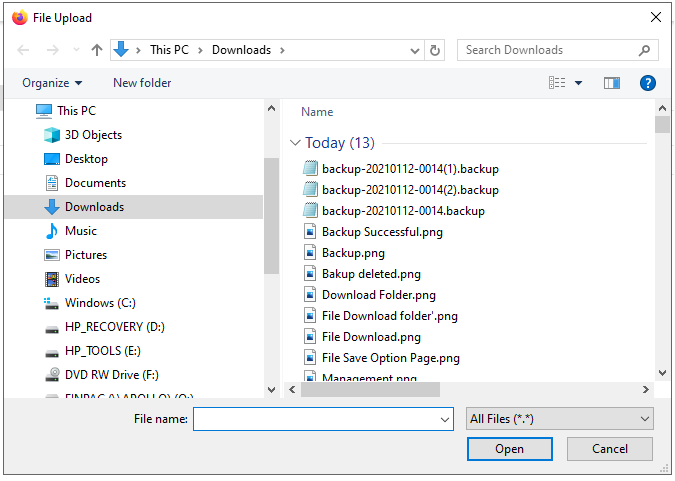
The user can now
browse
to the
location
where the
Backup files
are located and then
Upload
the applicable database by
Opening
the file.
The System will give an indication that the
Backup File
was
Uploaded
successfully
.
Once the
Backup file
has been
Uploaded
it will be
displayed
in the list of
available files
.
Top
Made with help of Dr.Explain