Menu
Index

Import and Export (CSV file data Import and Export)

Import and Export (CSV file data Import and Export)
 
1

General

1. General
The main purposes of this Menu Option is:
 
Instead of creating individual entries on the different screens the user can create an Excel file containing all relevant information and the save the file as a CSV file. The user can then do a "batch" upload / Import of the information that was captured by uploading the relevant CSV file. The following Administrative information can be Imported into the timetable System:
 
(i)     Subjects
(ii)     Educators
(iii)     Grades
(iv)     Classes
Note:     The information must be available in *.CSV file format.
 
Should the user have captured the above mentioned Administration information and want to manipulate the information outside the system, the Export function can be used for doing this
2

Export

2. Export
 
 
The user initiates the Export process by selecting a Current Data Set.
 
Left Click on the required data set (Subjects, Educators, Grades or Classes).
 
The Line in the Current Data Set list will turn Blue indicating that this is the Active Data Set.
 
In example below, the Subjects Data Set was selected.


The Record Count indicates the number of Subjects that have been created in the system. In this case there are 24 subjects.
 
Note:      Once a Current Data Set has been selected the Import and Export buttons will become Active.
 
The user can now Export the selected Data Set information by Left Clicking on the Export button.
 
The File Selection Dialogue Screen below will be displayed.
 
 
The system will by default allocate a file name to the export file corresponding to the Data set that was selected.
 
 
The file can now be saved by Left Clicking on the Save button. The file will by default be saved to the Download folder on the local machine.
 
The example Subject Code CSV file that was created, can be seen below. The same process can be followed to Export the remaining Data Sets.
 
Subject Code
Subject Name
ENG1
 English 1st Language
MLIT
 Maths Literacy
GEO
 Geography
TECH
 Technology
ZULU
 Zulu
SOTHO
 Sotho
MUSIC
 Music
EMS
 Economic and Management Sciences
BE
 Business Economics
HE
 Home Economics
CS
 Computer Studies
AFR2
 Afrikaans 2nd Language
ECON
 Economics
ACC
 Accounting
AC
 Arts and Culture
AFR1
 Afrikaans 1st Language
ENG2
 English 2nd Language
HIST
 History
LO
 Life Orientation
MATH
 Mathematics
NS
 Natural Sciences
PE
 Physical Education
SS
 Social Sciences
IT
 Information Technology


3

Import

3. Import
 
The user initiates the Import process by selecting a Current Data Set.
 
Left Click on the required data set (Subjects, Educators, Grades or Classes).
 
The Line in the Current Data Set list will turn Blue indicating that this is the Active Data Set.
 
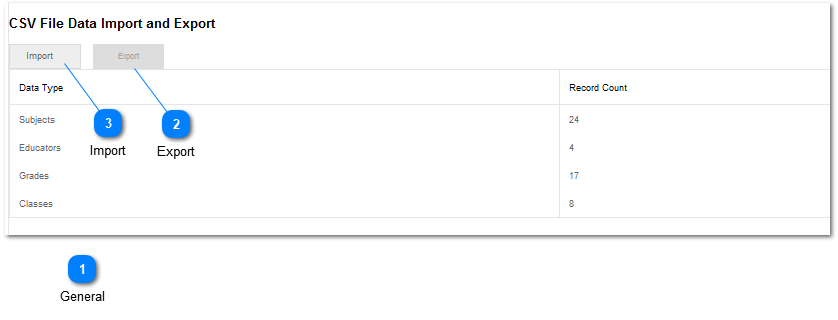
In his example, the Subjects Data Set was selected. The Information Panel will display the Current Data Set information.
 
The Record Count indicates the number of Subjects that have been created in the system. In this case there are 24 subjects.
 
Note:      Once a Current Data Set has been selected, the Import and Export buttons will become Active.
 
Import the selected Data Set information by Left Clicking on the Import button. The File Selection Dialogue Screen below will be displayed.
 
 
Select the file that needs to be imported.
 
Import the Data Set by Left Clicking on the Open button. system will give an indication that the information have been uploaded into the system. 


Made with help of Dr.Explain