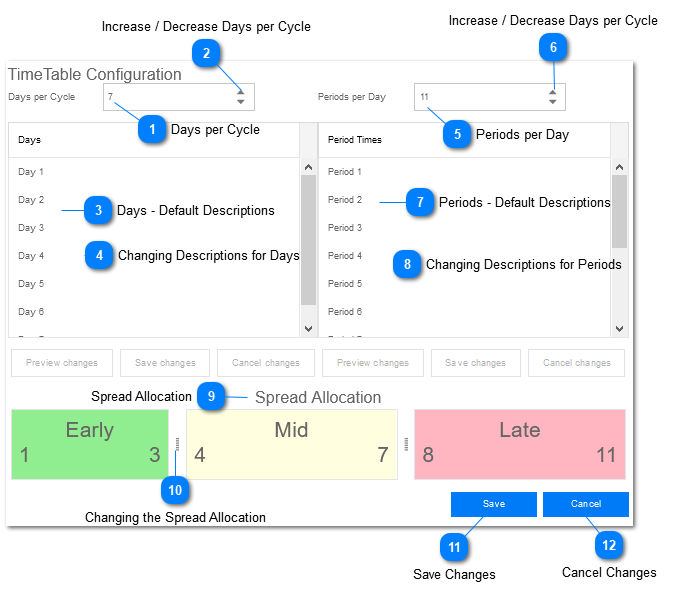
The user can Change this Description with any description that is applicable for the school by Left Clicking on the Descriptions and then typing in the applicable descriptions.
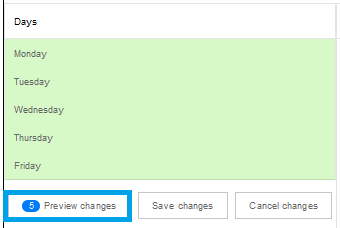
The Descriptions can, for example, be changed to Monday toFriday.
All the Fields that have been Updated will be Highlighted in Green.
For this example all the default names have been changed to week day names. The system gives an indication that 5 Changes have been made.
The user now has three options, which were previously inactive:
(i) Preview the Changes -
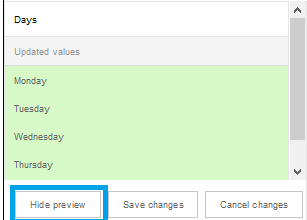
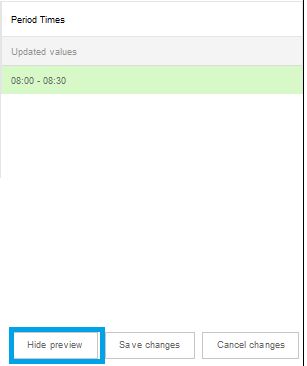
The System will display the Updated Values. If the user wants to do more Editing on the values, Select the Hide Preview Menu Option. The User will now be able to Edit the Values.
(ii) Save the Changes -
Once the user is satisfied that the Values are correct the Values are Saved to Session (Not to the database) by Selecting the Save Changes Menu Option. When all Changes have been made the user saves the all Changes that have been made to the database by Selecting the Save Option () at the bottom of the Page.
(iii) Cancel Changes -
The user Cancel all Changes that have been made by Selecting the Cancel Changes Menu Option. When this option is selected all values will be restored to the values before that user made changes.
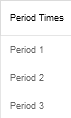
The Default description that will be displayed once the User has selected the number of Periods per Day is in the format as displayed : Period 1, Period 2 .... Period 10.
The user can Change this Description to any description that is applicable for the school by Left Clicking on the Descriptions and then typing in the applicable descriptions.
As an example the Descriptions can be changed to time frames eg. 08:00-08:45.
Note: The Descriptions entered will be used as Axis Labels in the Timetable Layout.
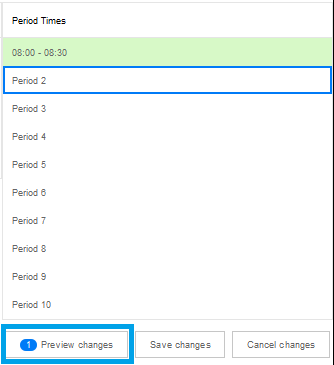
The user can Change this Description with any description that is applicable for the school by Left Clicking on the Descriptions and then typing in the applicable descriptions.
The Descriptions can, for example, be changed to 08:00 - 08:30 instead of Period 1 .
All the Fields that have been Updated will be Highlighted in Green.
For this example the system gives an indication that the 1 Change has been made.
The user now has three options, which were previously inactive:
(i) Preview the Changes -
The System will display the Updated Values. If the user wants to do more Editing on the values, Select the Hide Preview Menu Option. The User will now be able to Edit the Values.
(ii) Save the Changes -
Once the user is satisfied that the Values are correct the Values are Saved to Session (Not to the database) by Selecting the Save Changes Menu Option. When all Changes have been made the user saves the all Changes that have been made to the database by Selecting the Save Option () at the bottom of the Page.
(iii) Cancel Changes -
The user Cancel all Changes that have been made by Selecting the Cancel Changes Menu Option. When this option is selected all values will be restored to the values before that user made changes.
The Spread Allocation will be used during the setup of the Allocations.
The Spread Allocation is used to determine when a teacher would prefer a subject to be allocated in the timetable.
The Spread Allocation is divided into 3 Time Frames:
(i) Early
(ii) Mid
(iii) Late
Example:A Educator can prefer that his double periods should be scheduled for Early in the day while
single periods can be scheduled Mid or Late in a day.
For this example the user has entered 11 periods per day. When looking at the SpreadAllocation it can be seen that the system has automatically setup the Spread as follows:
The Spread can be changed by Left Clicking on one of the handles (Grey bars between 3 & 4 and 7 & 8) and Keeping The Mouse button Down. A grey bar will then be displayed.
Change the spread between Early and Mid by Dragging the Grey bar to the Left or to the Right.
The same procedure as mentioned above can be followed to change the Spread between Mid and Late.
Once all relevant School Information has been captured/changed, the information can be Saved by Left Clicking on the Save button.
Should the user have Saved any Changes, making use of the Save
Changes Option (), the changes will be saved to session.
The Changes must still be Saved to the Database.
This is done by Selecting the Save Option ()at the
bottom of the Page.
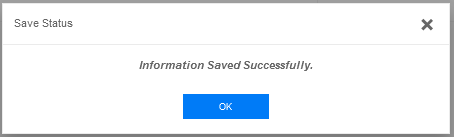
When the Save option is selected all information thathas been captured will be Saved to the database. The screen below will be displayed indicating that all information has been saved successfully:
When a user is Editing any of the fields, the values of the fields can be restored to the initial value before the changes were made by Left Clicking on the Cancel button.
Note: Once a change has been made and the user Saves the information to the database,
the Cancel button will not restore the initial information.