The user has the option of defining breaks and general activities on the Timetable screen before or after the subjects and educator allocations are configured on the Allocations screen, but
Tip: It is best practice to configure the educator allocations after School breaks and General activities have been configured. The reason for this being that the break
information for the school, teachers, classes, and rooms are used by the Allocations screen to perform allocation calculations and validations.
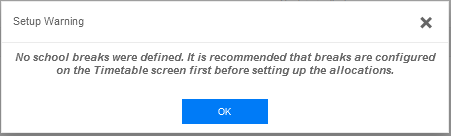
If the Allocations screen is opened before the general school breaks are defined, the notification screen below will be displayed:
The user can either continue with the allocations, or return to the Timetable Screen to Setup the school breaks, before continuing setting up the allocations.
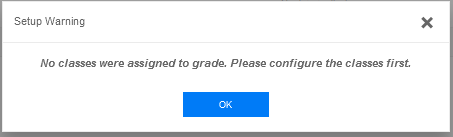
If no Classes have been created for the Grade the notification screen below will be displayed:
The user needs to create Classes for the a Gradebefore allocations can be done.
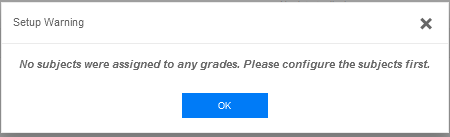
If no Subjects have been allocated to the Grades the notifications screen below will be displayed:
The user needs to allocateSubjects to the Gradesbefore allocations can be done.
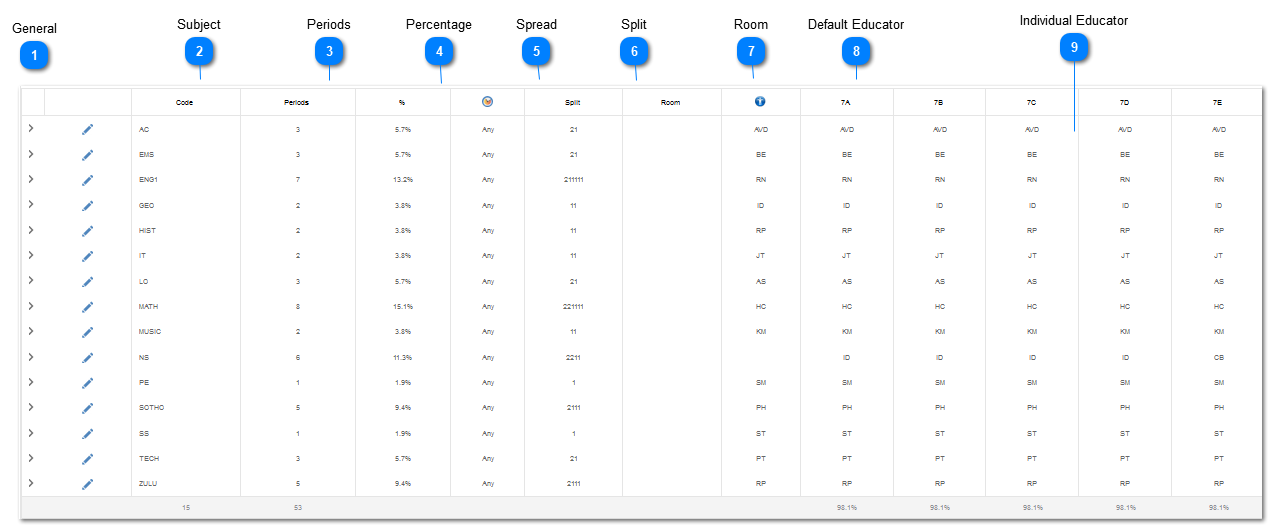
Allocation percentages indicate the percentage contribution for the specific Subject or split entry to the total number of periodsassigned to the current grade.